How to Unclog a Slow-Draining Bathroom Sink
Learn how to identify and clear a slow or clogged bathroom sink drain using simple household tools and techniques, without needing to call a plumber.
Materials
- Rubber gloves
- Old toothbrush or small cleaning brush
- Drain snake or zip-it drain cleaning tool
- Cup plunger
- Bucket or bowl
- Adjustable pliers or channel-lock pliers
- Baking soda (½ cup)
- White vinegar (½ cup)
- Boiling or very hot water
- Flashlight (optional)
- Rags or old towels
Before you start
- Ability to kneel or crouch near the sink cabinet
- Basic comfort with simple hand tools
Step 1 of 6

Remove and Clean the Drain Stopper
Put on your rubber gloves. Most bathroom sinks have a pop-up stopper that collects hair and soap scum right at the drain opening — this is the #1 cause of slow drains. 1. Lift or unscrew the stopper directly (many simply pull straight up or twist counter-clockwise to release). 2. If it doesn't come free, look under the sink for a pivot rod connected to a horizontal arm going into the drainpipe. Squeeze the clip and pull the rod out to release the stopper from above. 3. Once removed, use an old toothbrush or your gloved fingers to clean off all hair, soap, and gunk from the stopper and the drain opening just below it. 4. Rinse the stopper thoroughly under running water. Reinsert the stopper and test the drain. If water flows freely, you're done!
Use needle-nose pliers to grip stubborn hair that's wrapped tightly around the stopper rod.
- If Drain flows freely after cleaning the stopper, do You're done! Reassemble and enjoy your clear drain..
- If Drain is still slow after cleaning the stopper, do Proceed to Step 2 to tackle deeper buildup..
Common mistakes
- ×Forgetting to check under the sink for the pivot rod before forcing the stopper — this can break the linkage.
- ×Skipping this step and going straight to chemicals, when the stopper is almost always the culprit.
Step 2 of 6
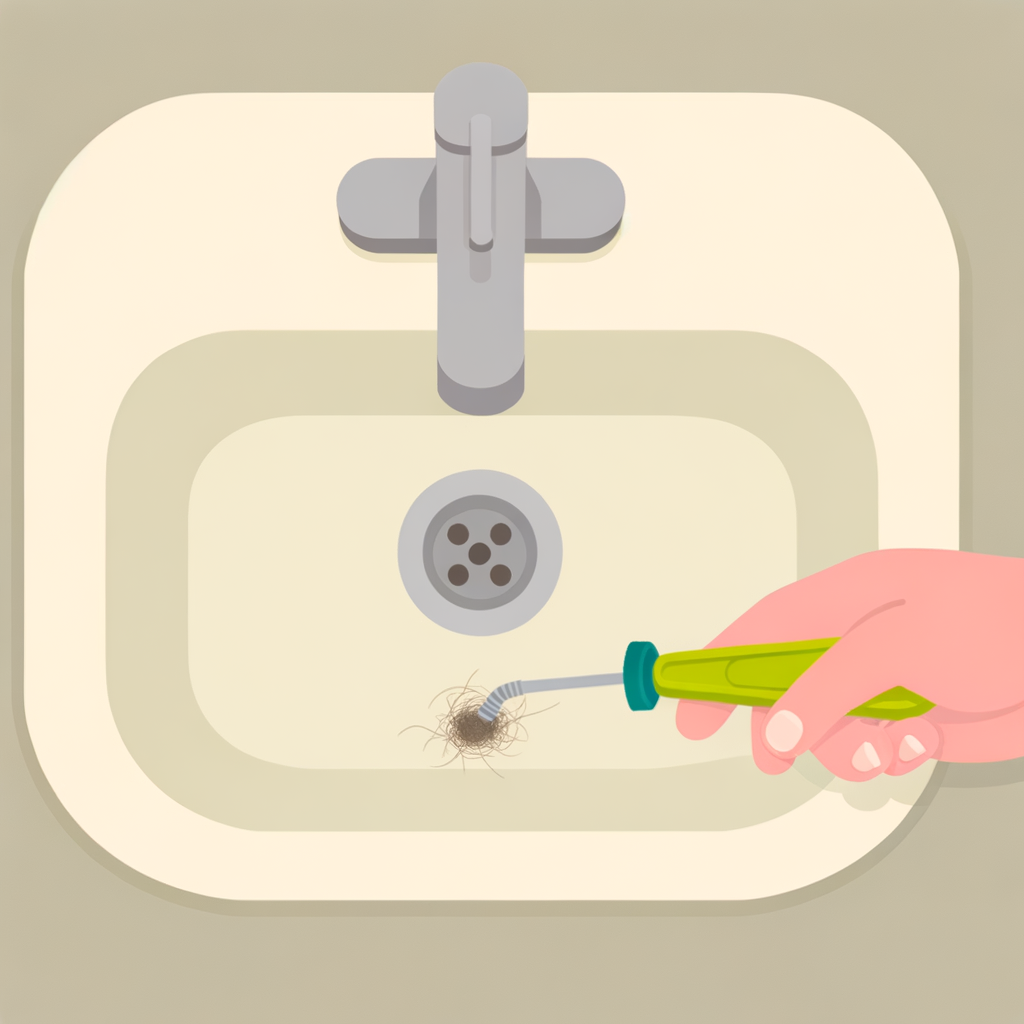
Use a Drain Snake or Zip-It Tool
A drain snake (also called a drain auger) or a cheap plastic zip-it tool can reach hair clogs sitting a few inches deeper in the drainpipe, just past the stopper seat. 1. Insert the zip-it tool or the end of the drain snake straight down into the drain opening. 2. Push it down 4–6 inches, then slowly rotate and wiggle it to hook onto any hair or debris. 3. Carefully pull the tool back out — you'll likely retrieve a significant clump of hair and soap scum. 4. Repeat 2–3 times until nothing more comes out. 5. Run hot water for 30 seconds to flush loosened debris down the drain. A zip-it tool costs about $3–$5 at any hardware store and is extremely effective for hair clogs.
Shine a flashlight into the drain before inserting the tool — you may be able to see exactly where the clog is sitting.
- If Drain flows freely after snaking, do Flush with hot water, reassemble the stopper, and you're finished..
- If Drain is still slow, do Move on to Step 3 for a natural chemical flush..
Common mistakes
- ×Pushing the clog further down instead of hooking and pulling it out — use a slow, twisting motion rather than jabbing.
- ×Using a drain snake that's too thick for a bathroom sink drain — a slim zip-it tool or a 1/4-inch hand snake works best.
Step 3 of 6
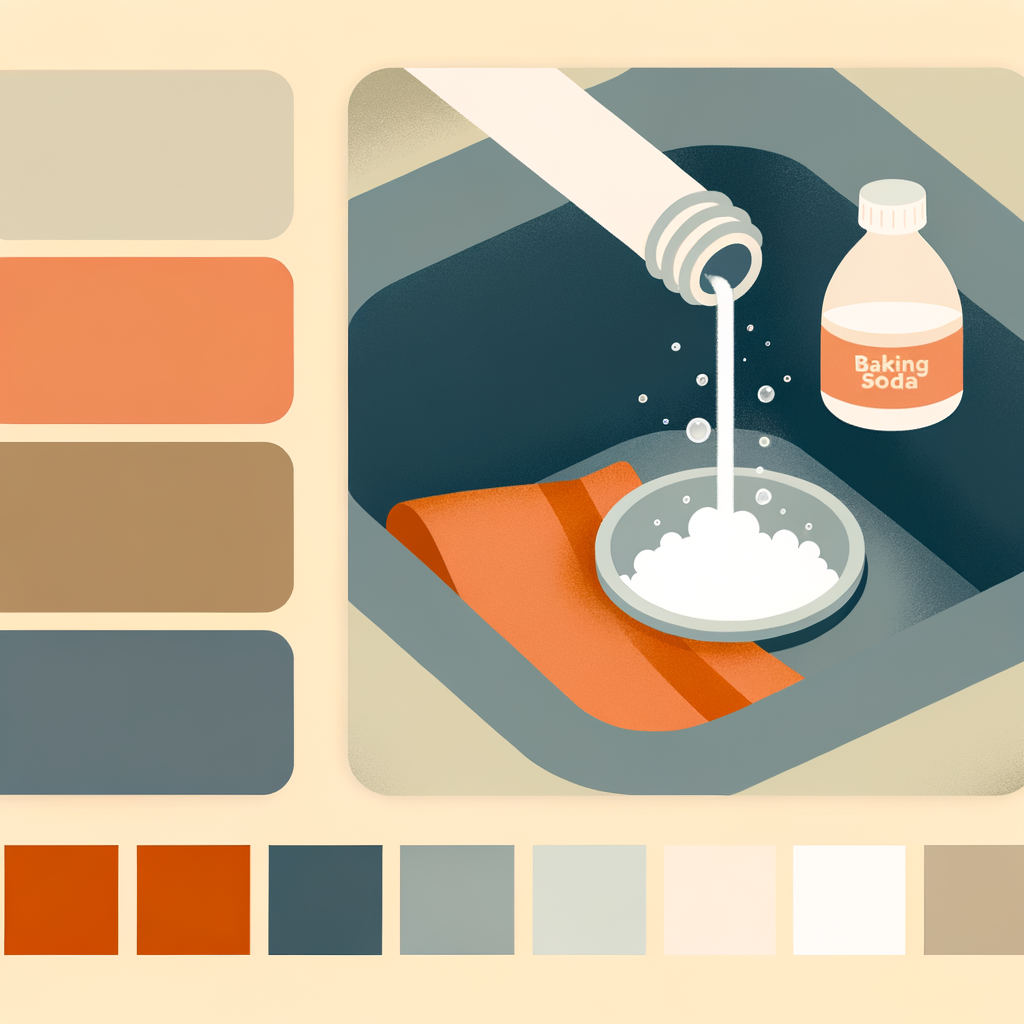
Flush with Baking Soda and Vinegar
This natural method helps dissolve soap scum and grease buildup coating the inside of the drainpipe. 1. Pour ½ cup of baking soda directly down the drain. 2. Follow immediately with ½ cup of white vinegar. 3. The mixture will fizz and bubble — this is normal and helps break up buildup. Cover the drain opening with a rag or drain stopper to direct the fizzing action downward. 4. Let it sit for 15–20 minutes. 5. Finish by flushing the drain with a full kettle of boiling water (or very hot tap water if you have PVC pipes). This step works best on soap scum and grease rather than hair clogs, so it pairs well with the snaking done in Step 2.
For a stronger effect, let the baking soda and vinegar mixture sit overnight before flushing.
- If Drain is now flowing freely, do Great! Reassemble the stopper and you're done..
- If Drain is still draining slowly, do Try plunging the drain in Step 4..
Common mistakes
- ×Adding the vinegar too slowly — pour it in quickly right after the baking soda for the best fizzing reaction.
- ×Skipping the hot water flush at the end, which is essential for washing away the dissolved buildup.
Step 4 of 6

Plunge the Drain
A cup plunger creates suction pressure that can dislodge clogs sitting deeper in the pipe. 1. Remove the drain stopper if it's still in place. 2. Fill the sink with 1–2 inches of water (enough to cover the plunger cup). 3. Block the sink overflow hole (the small hole near the top of the sink basin) with a wet rag — this ensures the suction goes down into the drain rather than escaping. 4. Place the cup plunger directly over the drain opening, creating a tight seal. 5. Plunge vigorously up and down 10–15 times, then pull the plunger away sharply. 6. Check if the water drains. Repeat 2–3 times if needed.
Use a cup (bell-shaped) plunger, not a flange plunger — flange plungers are designed for toilets and won't seal properly on a flat sink drain.
- If Drain clears after plunging, do Run hot water for a full minute to flush any remaining debris, then reassemble..
- If Drain is still clogged, do The clog may be in the P-trap. Proceed to Step 5..
Common mistakes
- ×Not blocking the overflow hole, which breaks the suction and makes plunging ineffective.
- ×Using a flange/toilet plunger instead of a flat cup plunger.
Step 5 of 6
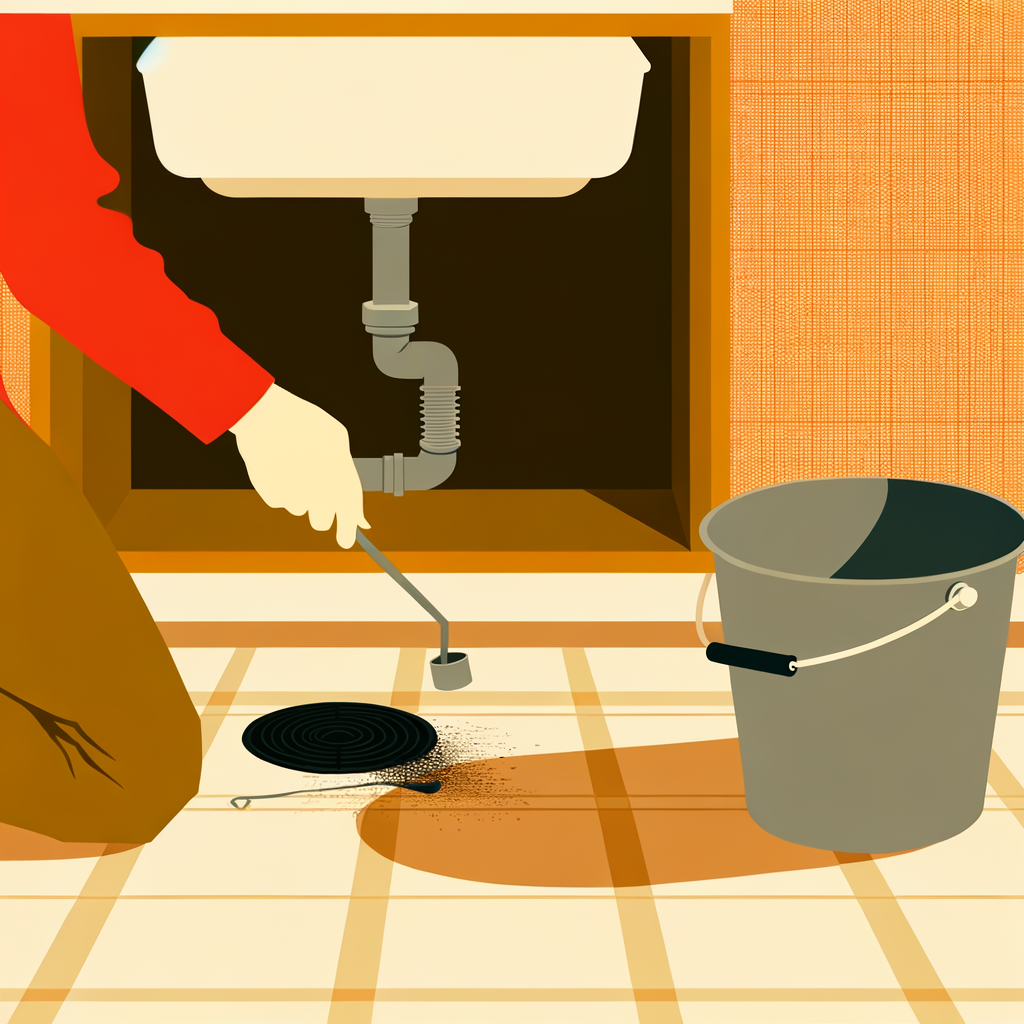
Clean Out the P-Trap
The P-trap is the curved pipe section beneath your sink (shaped like a 'P' or 'U'). Debris can accumulate here and cause persistent slow drainage. 1. Place a bucket or bowl directly under the P-trap to catch water. 2. Use adjustable pliers to loosen the two slip-joint nuts on either end of the curved P-trap section (turn counter-clockwise). On newer sinks, these may be hand-tightened and removable without tools. 3. Carefully remove the P-trap — water and debris will spill into your bucket. 4. Inspect the trap for clogs and clean it out thoroughly using an old toothbrush or by rinsing it under a different faucet. 5. Also shine a flashlight into the open drainpipe in the wall to check for visible blockages. 6. Reattach the P-trap, hand-tighten the nuts (then snug with pliers — do not overtighten), and run water to test for leaks.
Wrap pliers jaws with tape to avoid scratching chrome or plastic P-trap fittings.
- If P-trap was clogged and drain now flows freely, do Run water for 1–2 minutes and check all joints for leaks. You're done!.
- If P-trap was clear and drain is still slow, do The blockage is deeper in the wall pipe. Proceed to Step 6..
Common mistakes
- ×Overtightening the slip-joint nuts when reassembling, which can crack plastic fittings — snug is enough.
- ×Forgetting to place a bucket underneath before loosening the P-trap, resulting in a watery mess.
Step 6 of 6
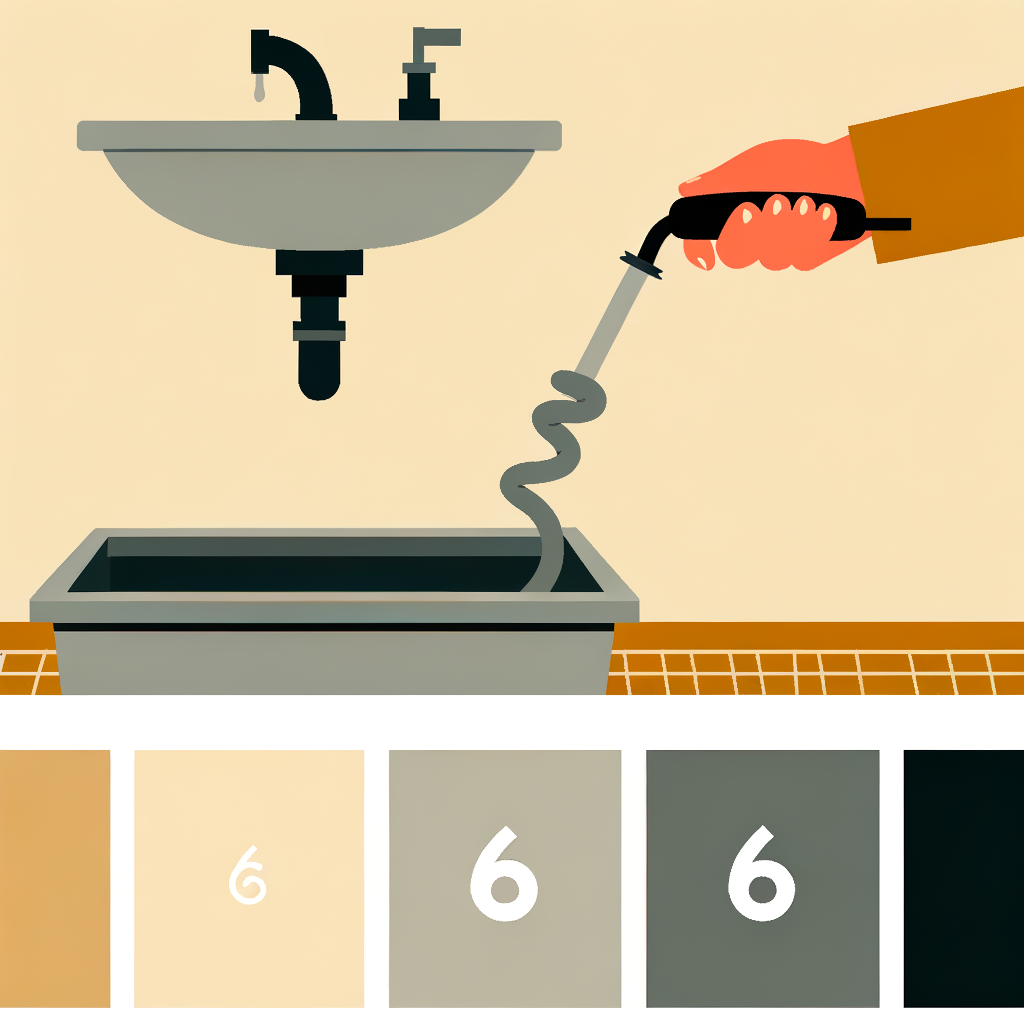
Snake the Drainpipe or Call a Plumber
If the clog is past the P-trap and deeper in the wall pipe, you'll need a longer drain snake (hand auger) to reach it — or it may be time to call a professional. **Using a hand auger:** 1. With the P-trap removed, insert the end of a hand drain snake (at least 15–25 feet long) directly into the drainpipe opening in the wall. 2. Feed the cable in while turning the handle clockwise to drive it forward. 3. When you feel resistance, you've hit the clog — continue rotating to break it up or hook it. 4. Pull the snake back out slowly, bringing debris with it. 5. Reattach the P-trap, run hot water, and check for proper drainage. **When to call a plumber:** - The clog doesn't clear after snaking. - Multiple drains in your home are slow (suggests a main line issue). - You notice gurgling sounds from other drains or toilets. - You see water backing up into other fixtures.
Rent a power drain auger from a hardware store for under $30/day if you don't own one — it's much more effective than a manual snake for deep clogs.
- If Drain clears after snaking the wall pipe, do Reassemble the P-trap, flush with hot water, and check for leaks. Job done!.
- If Clog persists, or multiple drains are affected, do Contact a licensed plumber — this is likely a main line blockage beyond DIY reach..
Common mistakes
- ×Forcing the snake too aggressively, which can damage older pipes — use steady, controlled rotation.
- ×Ignoring signs of a main line clog (multiple slow drains, gurgling) and only addressing the one sink.
Sources
Generated from model knowledge — verify any factual claims independently.