How to Apply for a US Visa as an Indian Citizen
Learn the complete step-by-step process for applying for a US nonimmigrant visa (B1/B2 or other categories) as an Indian passport holder, from determining your visa type to attending your embassy interview.
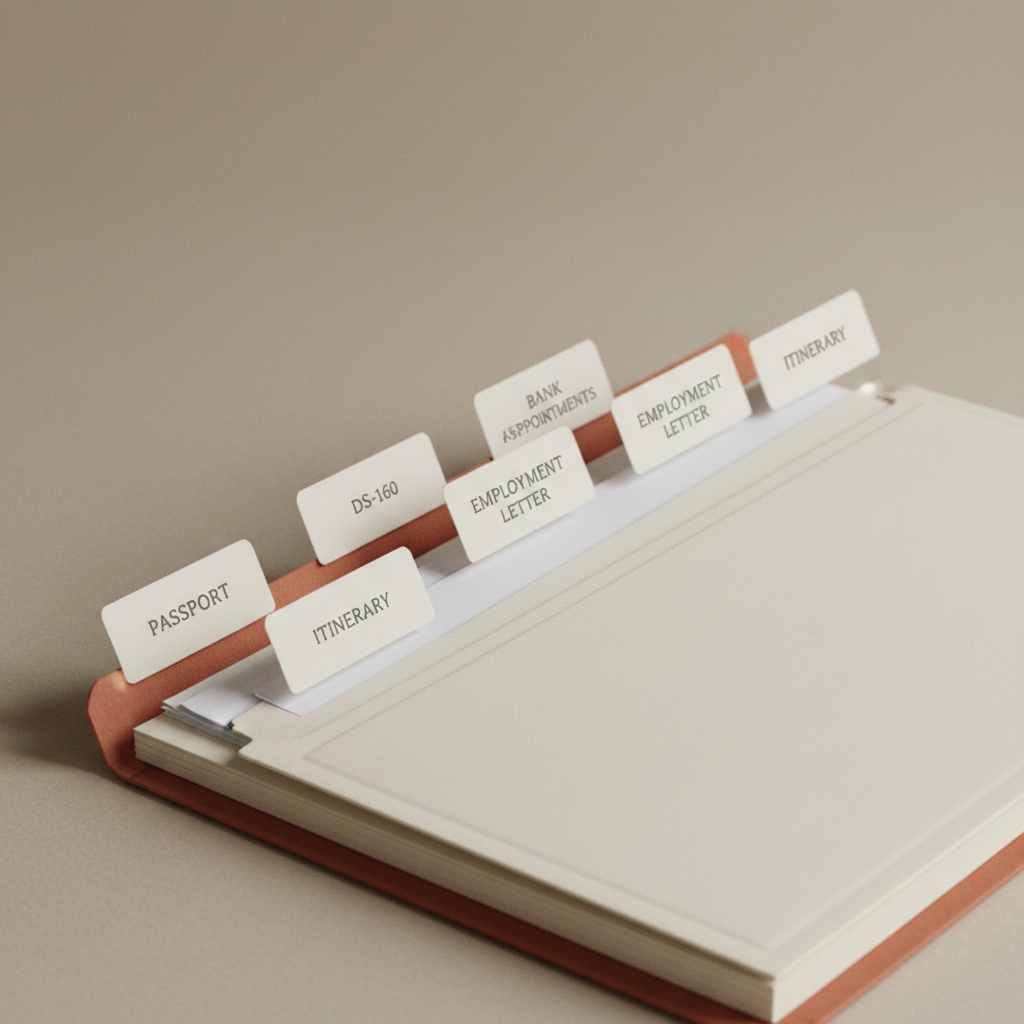
Materials
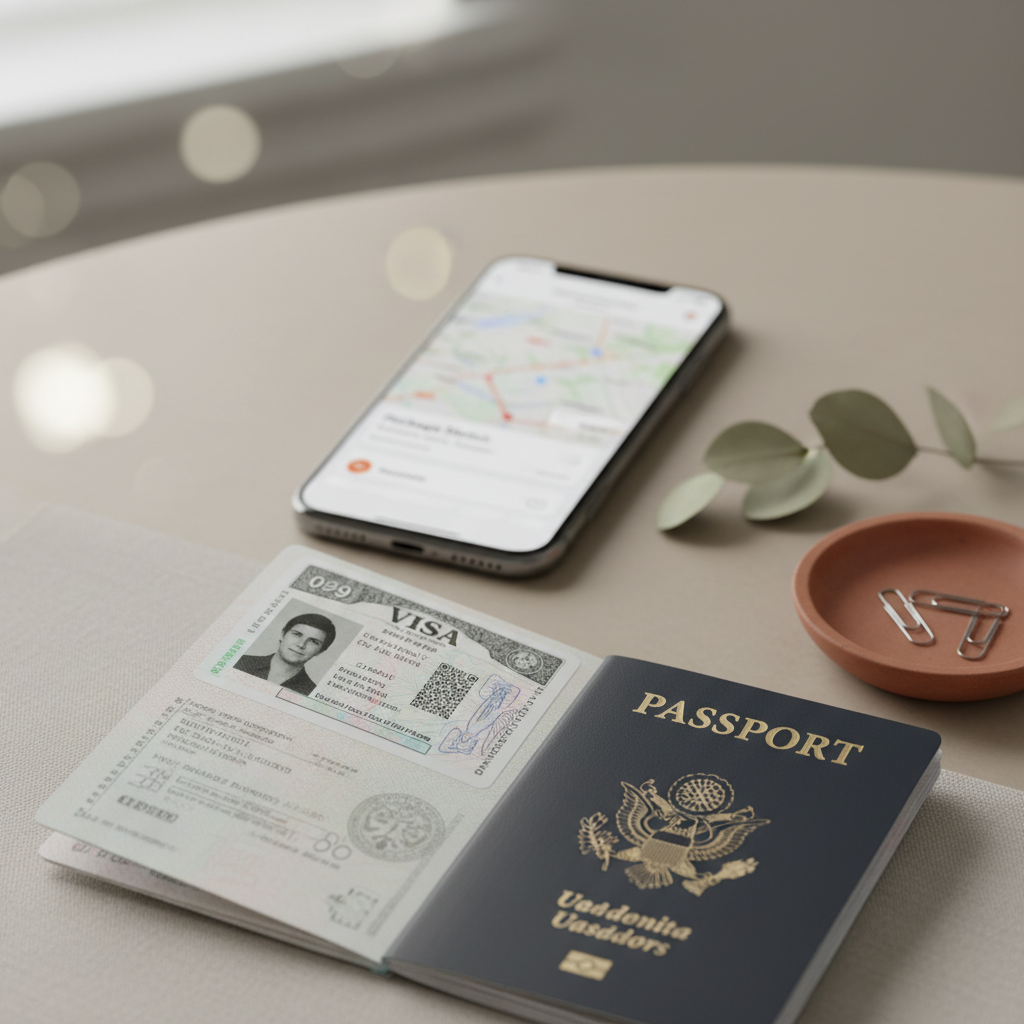
- Valid Indian passport
- Recent passport-size photographs (2x2 inches, white background)
- DS-160 confirmation page (printed)
- Visa fee payment receipt (MRV fee)
- Appointment confirmation letter (printed)
- Supporting documents: bank statements, ITR, employment letter, travel itinerary, hotel bookings
Before you start
- Valid Indian passport with at least 6 months validity beyond your intended stay
- A valid email address for correspondence
- Access to a computer and printer for forms and confirmation pages
Step 1 of 7
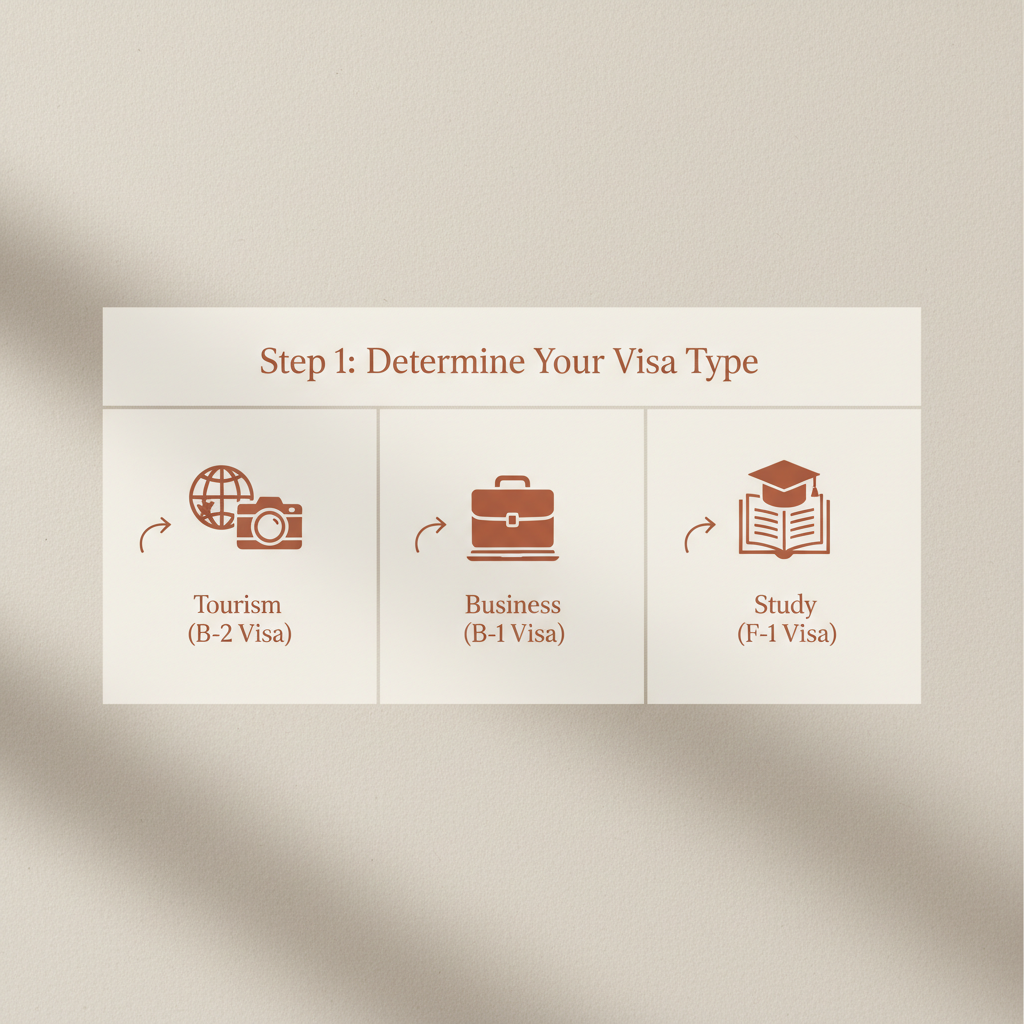
Determine the Right Visa Category
Before starting your application, identify which US visa type suits your purpose of travel. Common visa categories for Indian citizens: 1. B-1 (Business Visitor) — attending meetings, conferences, or negotiations. 2. B-2 (Tourist/Pleasure) — tourism, vacation, visiting family or friends, medical treatment. 3. B1/B2 (Combined) — the most commonly issued type, covering both business and tourism. 4. F-1 (Student) — enrolling in a US academic institution. 5. H-1B (Work) — employer-sponsored skilled worker visa. For most leisure or short-term visits, the B1/B2 visa is the appropriate choice. Visit the official US Embassy India website or travel.state.gov to confirm the correct category for your specific purpose before proceeding.
If you are unsure between B-1 and B-2, apply for the combined B1/B2 — it gives you flexibility and is the standard tourist/business visa issued to most Indian applicants.
- If If you are visiting for tourism, vacation, or to see family, do Apply for the B-2 or combined B1/B2 nonimmigrant visa..
- If If you are enrolling in a US university or language school, do Apply for the F-1 student visa and obtain a SEVIS I-20 form from your institution first..
Common mistakes
- ×Applying for the wrong visa category, which can lead to rejection at the port of entry even if the visa is granted.
- ×Assuming a tourist visa covers paid work or long-term study — it does not.
Step 2 of 7
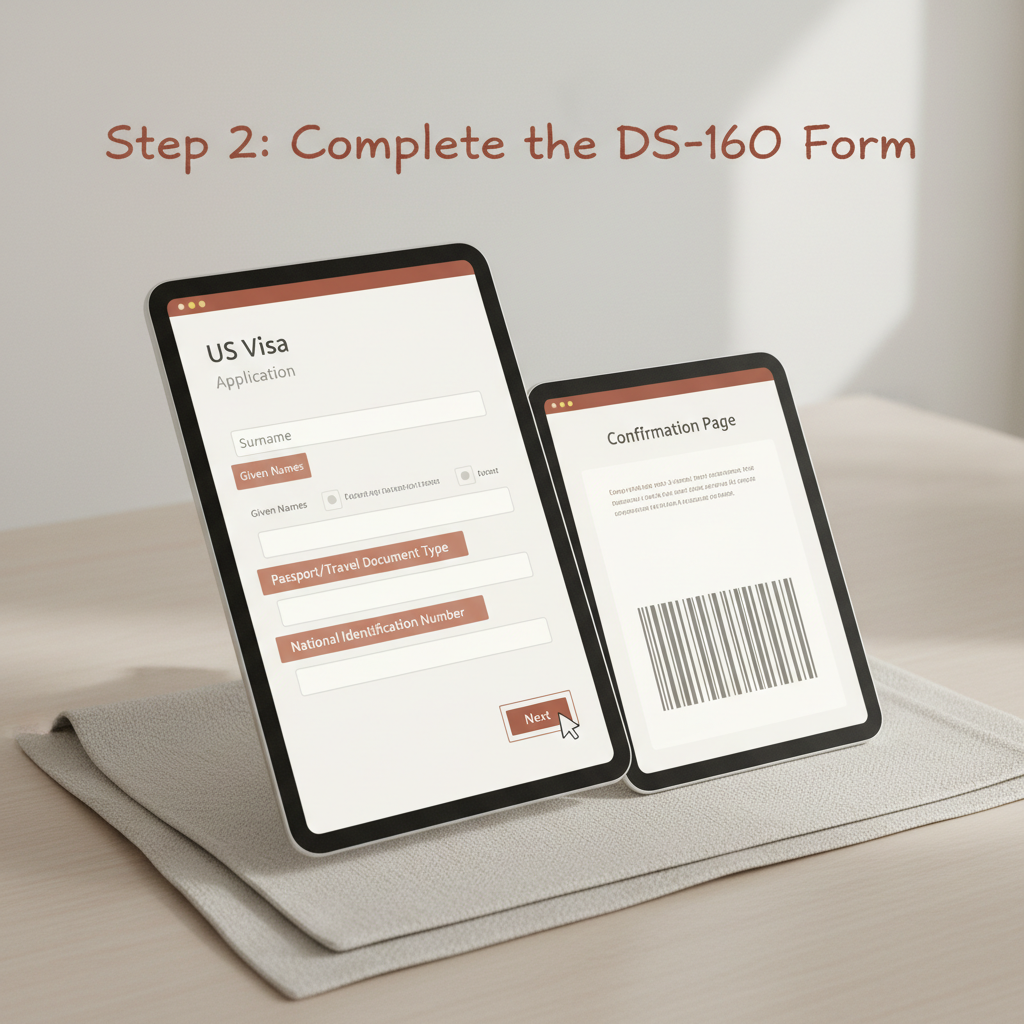
Complete the DS-160 Online Application Form
The DS-160 is the mandatory online nonimmigrant visa application form. Follow these steps: 1. Go to ceac.state.gov and start a new DS-160 application. 2. Select the US Embassy or Consulate in India where you plan to attend your interview (Mumbai, New Delhi, Chennai, Hyderabad, or Kolkata). 3. Fill in all required sections: personal information, passport details, travel plans, family information, work and education history, and security questions. 4. Upload a digital passport-style photograph meeting US visa photo requirements (2x2 inches, white background, taken within the last 6 months). 5. Review all entries carefully before submitting — corrections after submission require a new application. 6. After submission, save and print the DS-160 confirmation page with the barcode. You will need this at your appointment.
Save your application ID frequently as you fill the form. The session can time out, but you can retrieve your progress using the application ID.
- If If you make an error after submitting the DS-160, do Start a new DS-160 application and use the new confirmation barcode — the old one becomes invalid..
Common mistakes
- ×Entering travel dates or purpose inconsistently with your supporting documents.
- ×Uploading a photo that does not meet US visa specifications, causing the application to be rejected.
- ×Not printing the DS-160 confirmation page — without it, you cannot attend the interview.
Step 3 of 7
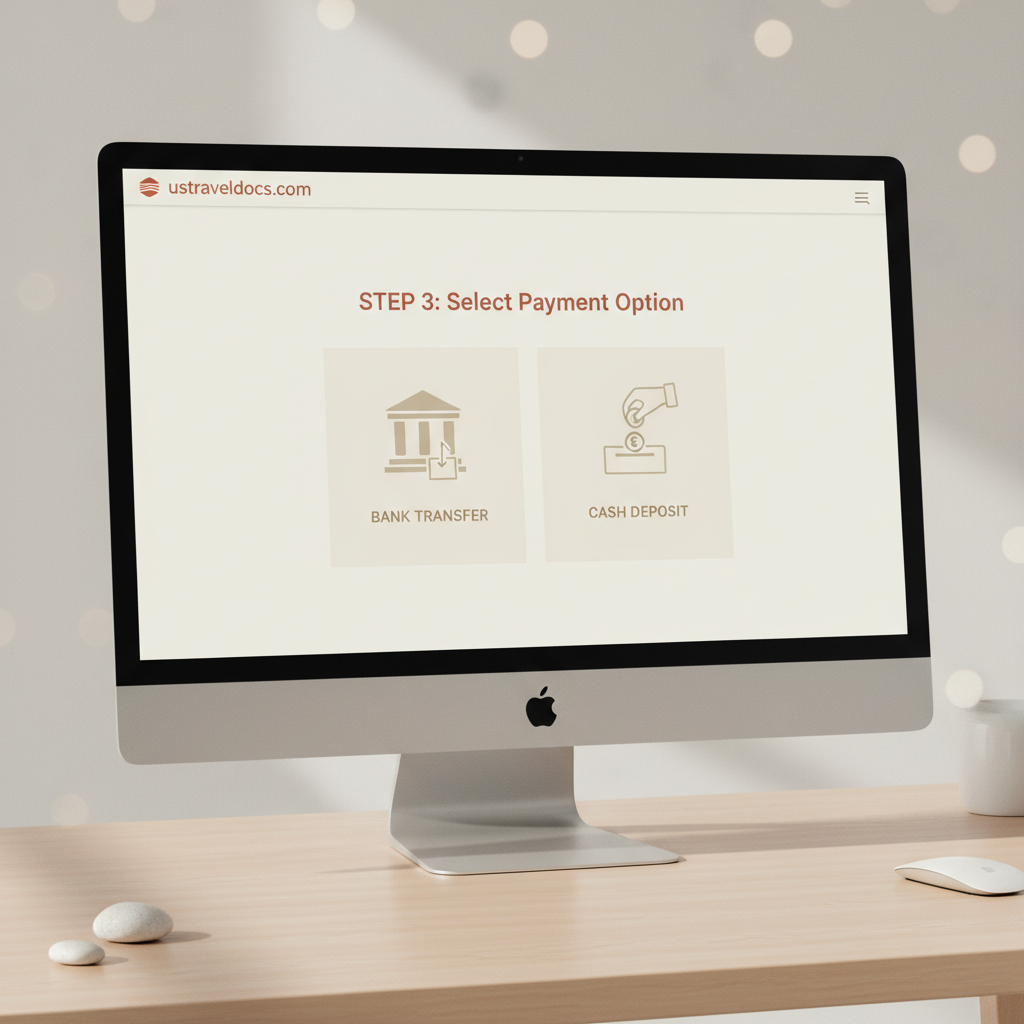
Pay the Visa Application Fee (MRV Fee)
You must pay the non-refundable Machine Readable Visa (MRV) fee before scheduling your appointment. 1. Visit the official US visa appointment scheduling portal for India: ustraveldocs.com/in. 2. Create a profile or log in. 3. The fee for a B1/B2 visa is currently USD 185 (approximately INR 15,000+, subject to exchange rate). Check the current amount on the official site. 4. Payment options in India include: • NEFT/RTGS bank transfer to the designated Citibank account. • Cash deposit at designated Citibank branches. • Demand Draft (DD) at select locations. 5. After payment, the fee reflects in your profile within 2 to 3 business days. 6. Save your payment receipt — you will need the receipt number to schedule your appointment.
Do not pay through any third-party website. Only pay through ustraveldocs.com/in to ensure your payment is linked to your profile correctly.
Common mistakes
- ×Paying the fee before completing the DS-160, which can cause a mismatch in records.
- ×Losing the payment receipt number — without it you cannot proceed to schedule your appointment.
Step 4 of 7
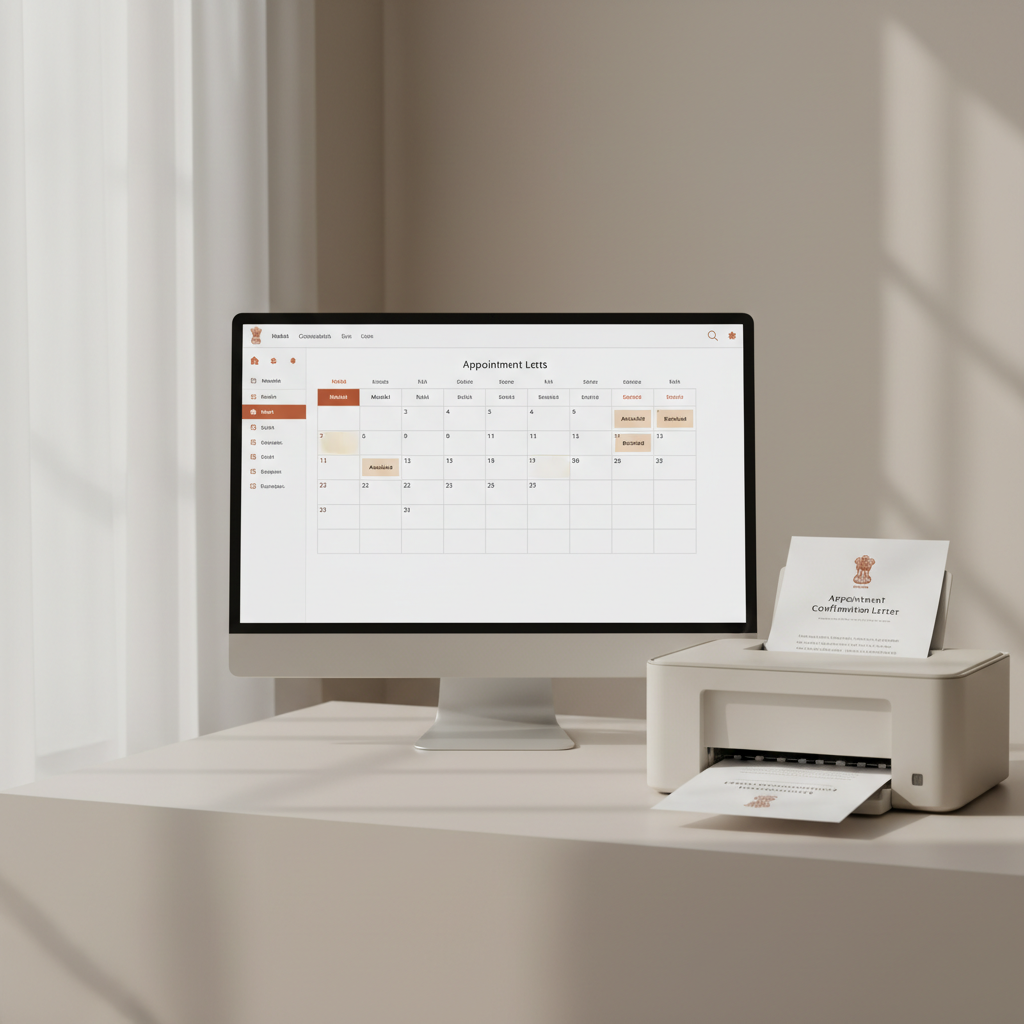
Schedule Your Visa Interview Appointment
Once your fee payment is confirmed, schedule your interview at the nearest US Consulate or Embassy in India. US Visa application centers (VACs) and consular posts in India are located in: 1. New Delhi (Embassy) 2. Mumbai (Consulate) 3. Chennai (Consulate) 4. Hyderabad (Consulate) 5. Kolkata (Consulate) Steps to schedule: 1. Log in to ustraveldocs.com/in with your profile. 2. Enter your passport number, DS-160 barcode number, and MRV fee receipt number. 3. Select your preferred consulate location. 4. Choose an available date and time for your interview. 5. Print the appointment confirmation letter. Note: Wait times can vary from a few weeks to several months depending on the consulate and season. Check current wait times on the official site and plan well in advance.
If your travel date is urgent, check all five consulate locations — availability varies and you may find an earlier slot at a different city.
- If If no slots are available at your nearest consulate, do Check other consulate locations in India — you can attend any consulate regardless of your city of residence..
Common mistakes
- ×Scheduling the appointment at a consulate far from your residence without accounting for travel logistics on interview day.
- ×Not checking current wait times and booking too close to your intended travel date.
Step 5 of 7
Gather and Organize Your Supporting Documents
Prepare a well-organized document package to present at your interview. Required documents typically include: Mandatory: 1. Valid Indian passport (and any old passports with previous US visas). 2. Printed DS-160 confirmation page. 3. Appointment confirmation letter. 4. MRV fee payment receipt. 5. One passport-size photograph (2x2 inches, white background) — even if uploaded digitally. Supporting documents to demonstrate ties to India and financial ability: 6. Bank statements for the last 3 to 6 months. 7. Income Tax Returns (ITR) for the last 2 to 3 years. 8. Salary slips or business ownership proof. 9. Employment letter stating your designation, salary, and approved leave. 10. Property documents, fixed deposits, or other assets. 11. Travel itinerary (flight bookings) and hotel reservations. 12. Invitation letter if visiting family or friends in the US. 13. For students: college/school enrollment letter. Organize documents in a clear folder in the order listed above for a smooth interview experience.
Do not submit fake or exaggerated documents. Consular officers are trained to spot inconsistencies, and misrepresentation leads to permanent bans.
Common mistakes
- ×Bringing only financial documents without proof of strong ties to India (job, family, property) — officers need to see you have reasons to return.
- ×Forgetting to print the DS-160 confirmation page or appointment letter.
- ×Bringing originals only without photocopies — carry both.
Step 6 of 7

Attend the Visa Interview at the US Consulate
The interview is the most critical step. Here is what to expect and how to prepare: Before the interview: 1. Arrive at least 15 to 30 minutes early. 2. Do not carry prohibited items: laptops, large bags, food, or electronic devices other than a basic mobile phone (policies vary by consulate — check the specific consulate's website). 3. Dress neatly and professionally. At the consulate: 1. Security check and document verification at the entrance. 2. Biometric data collection (fingerprints and photo). 3. Brief interview with a consular officer at a window — typically 2 to 5 minutes. Common interview questions: • What is the purpose of your visit? • How long do you plan to stay? • Who will fund your trip? • Do you have family or friends in the US? • What do you do in India (job/business/studies)? • Have you traveled abroad before? Answer honestly, confidently, and concisely. The officer may approve on the spot, ask for additional documents, or deny the application.
Keep your answers short and direct. Do not volunteer unnecessary information. If you do not understand a question, politely ask the officer to repeat it.
- If If the officer asks for additional documents (221g administrative processing), do Submit the requested documents promptly via the method specified (drop box or email). Your visa decision will come after review, which may take weeks..
- If If your visa is approved, do Your passport will be retained and returned to you by courier within a few business days with the visa stamp inside..
Common mistakes
- ×Giving long, rambling answers — officers have limited time and prefer clear, concise responses.
- ×Appearing nervous or inconsistent — practice your answers beforehand with a friend or family member.
- ×Not being able to explain your travel itinerary — know your plans well.
Step 7 of 7
Track Your Passport and Receive Your Visa
After a successful interview, your passport is sent for visa stamping and returned to you by courier. 1. You will receive a tracking number via SMS or email from the courier service (typically VFS or a similar provider). 2. Track your passport status on the ustraveldocs.com/in portal under your profile. 3. Standard processing after interview approval takes 3 to 5 business days, though it can vary. 4. Once you receive your passport, carefully check: • Your name and date of birth are correct. • The visa type matches what you applied for (e.g., B1/B2). • The visa validity dates and number of entries (single or multiple) are as expected. 5. If you find any errors, contact the US Embassy immediately — do not travel with an incorrect visa. Congratulations — once you have your visa, you are ready to plan your US trip!
US B1/B2 visas for Indian citizens are often issued with a 10-year validity with multiple entries — but your actual stay is determined by the CBP officer at the US port of entry, typically up to 6 months per visit.
Common mistakes
- ×Assuming the visa validity period equals your allowed stay — the visa validity only determines when you can enter, not how long you can stay.
- ×Not checking the visa stamp for errors before traveling.
Sources
Generated from model knowledge — verify any factual claims independently.